

Flowers have feelings instilled in them that very little else has. One bloom may remind you of a wedding day, a date, graduation, or strolling around the garden on a sunny afternoon. Alas, flowers do not live forever—unless you're privy to the secrets of pressing flowers. If you know how to press flowers, you're able to keep those feelings safe and turn them into permanent keepsakes.
Whether you're pressing flowers with books, or using newer methods like microwave pressed flowers, this article will walk you through it all. We'll also give you beginner tips on flower pressing, ideas for using your blooms, and advice on how to keep your pressed bouquets looking their best for years to come.
Flower pressing is more than a craft. It's a means to treasure memories and turn them into something special. Think about making the roses from your wedding flowers into pieces of framed art, or saving wildflowers from a road trip in your memory book. With each flower pressed, it's as if it creates a time capsule of feelings.
The US people have been pressing flowers for centuries. During the Victorian era, it was all the rage. Nowadays, it is not only a retro thing but also an eco-friendly, thrifty method to create art from nature. Rather than discarding bouquets once wilted, you can preserve them and have reminders that speak of your story.
At its core, pressing flowers is about removing moisture without losing color or shape. The process may vary depending on the method, but the principle is the same. Let’s break down the most common ways:
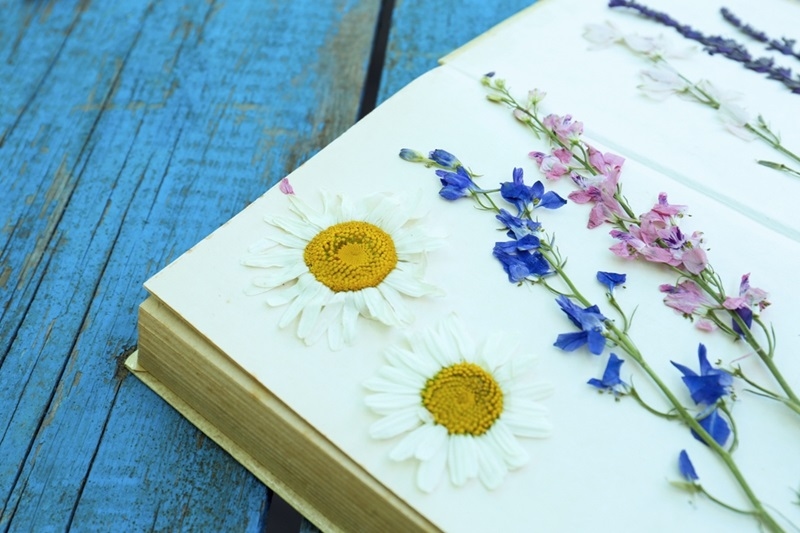
If you’re starting out and don’t want to buy supplies, pressing flowers with books is perfect. Here’s how it works:
It is a slow but effective process. Many find it fun because it's antiquated and tangible, much like the way past generations dried flowers.
Other times patience is not your strong point, and that is when microwave pressed flowers save the day. This technique provides results within minutes rather than weeks.
Microwave technique is ideal for crafters who want instant materials for tasks like greeting cards or resin jewelry. But it requires some practice to yield perfect results.
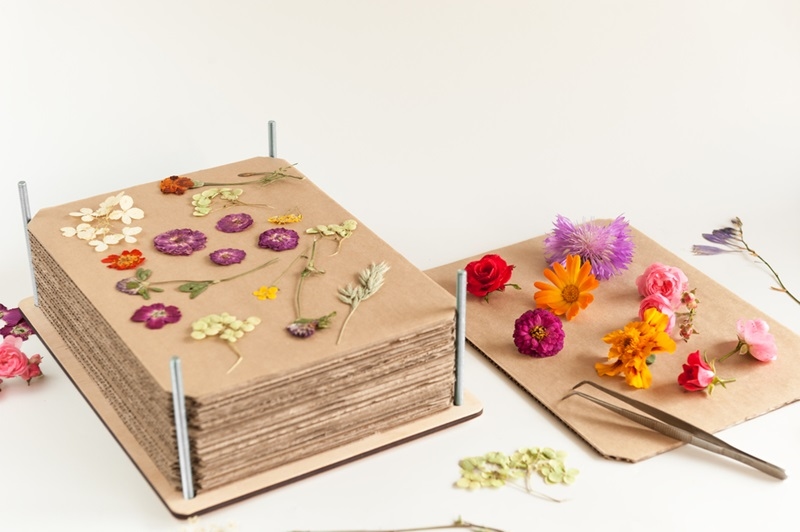
If you are going to press flowers on a regular basis, a wood press is an investment worth making. It contains layers of cardboard and screws to provide equal pressure. It provides similar results quicker compared to pressing flowers between books.
How to use:
This process is cost-effective when you need to dry a large amount at once, such as when saving pressed wedding or anniversary flowers.
Some flowers, such as roses or tulips, are too heavy to press flat out. Then drying them first with silica gel is effective. After drying them, you can press out the petals on their own. Not quite the old-fashioned way, but it leaves you with more space to work with the hard-to-press flowers.
When you are a beginner with flower pressing, the thrill of it all sometimes results in errors. These are some tips for flower pressing beginners to help the process run more smoothly:
With practice, you'll find out which flowers in your garden or neighborhood market press most satisfactorily.
Once you know how to press flowers, the job is to craft with them. There are just so many pressing flower craft ideas you can try, ranging from tiny mementos to big house decor pieces. Some of the favorites are:
These crafts not only celebrate creativity but also save your flowers in useful, meaningful ways.
For all of us, flower pressing begins with a bouquet from some celebration of life. A wedding bouquet, anniversary flowers, or funeral flowers from someone you love are all possibilities. Keeping pressed bouquets is a gentle way to keep the memory near.
Here's how you can do it:
That way, rather than sitting there and watching flowers turn into mush, you can save the memory in a piece of art that will last for decades.
Even once you've perfected pressing flowers, there are some pitfalls that will spoil your finish. Most common errors are:
By keeping away from these mistakes, you will have beautiful, clean finishes every time.
Flower pressing is a hobby that goes beyond a craft—indeed, it's more of an art, science, and memory preserver. Thanks to the flower pressing beginner tips, you are protected from errors and colorful results.
Then the magic starts: creating those flowers into works of art in pressed flower design or in framing pressed bouquets. Each item that you make is a tale to be told, one of love and loss, of celebration, or just the simplicity of a summer afternoon.
In a busy world, pressing flowers encourages us to slow down, notice the details, and preserve moments before they slip away. And the best thing? After you learn the fundamentals, you will never see a flower in the same light again. Every flower presents a chance to make a memory that will last forever.
This content was created by AI